
Introduction
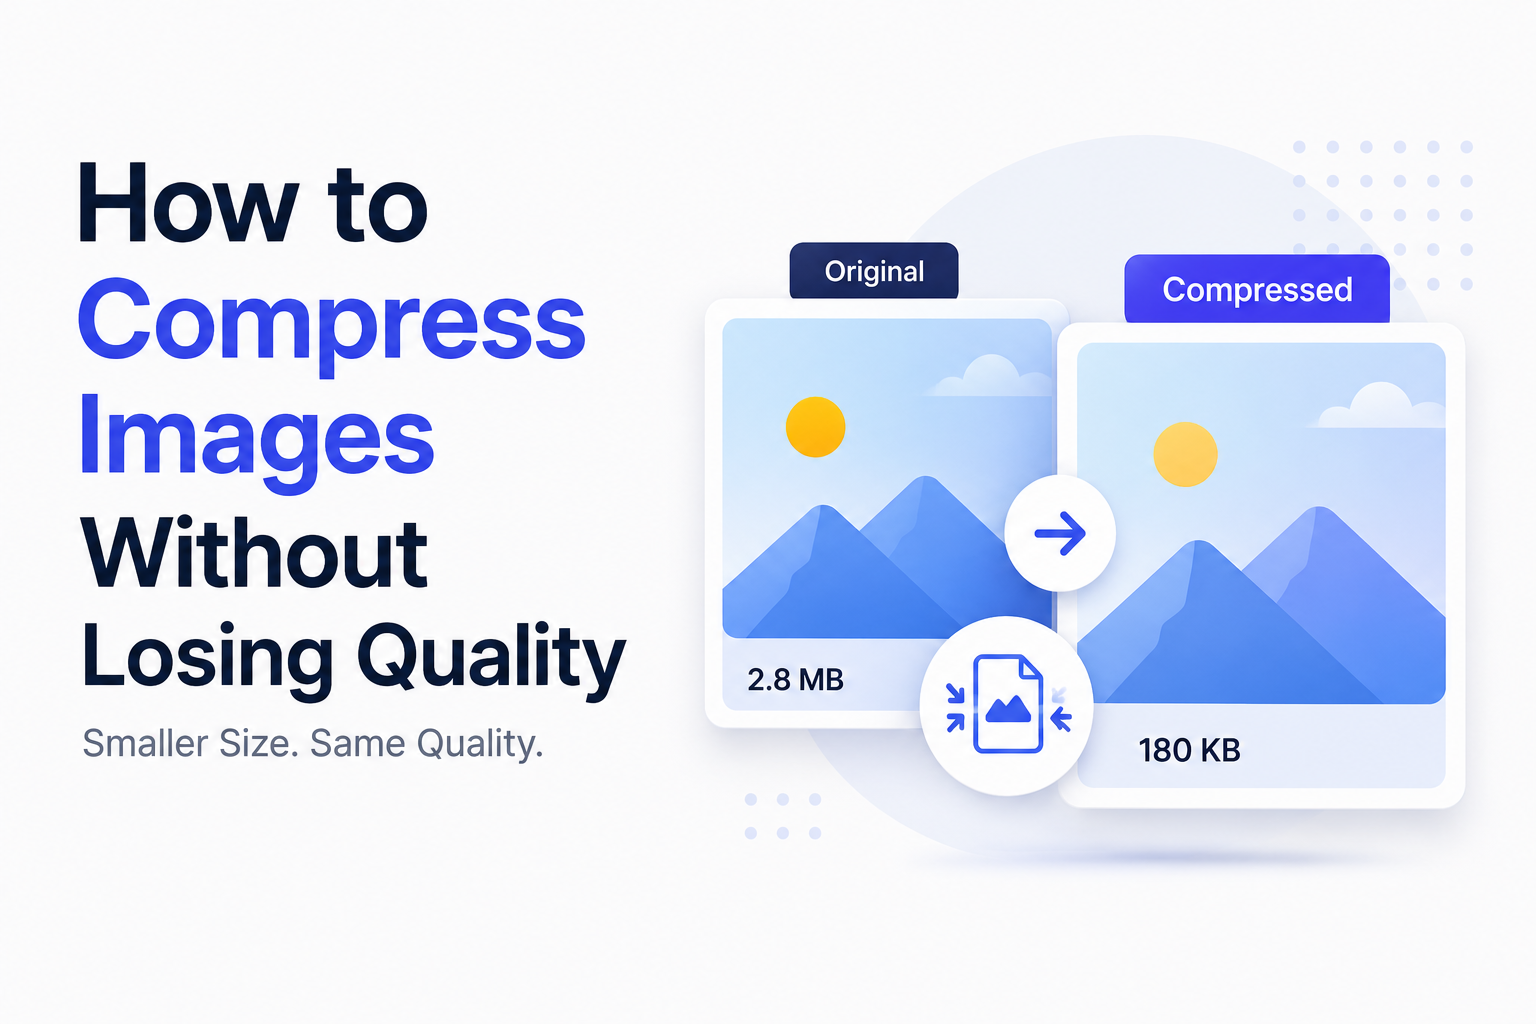
Images make websites more attractive, improve user engagement, and help explain information visually. However, high-quality images often come with one major drawback—they create large file sizes. When images are too large, websites load more slowly, consume more storage space, and use additional bandwidth, resulting in a poor experience for visitors.
Fortunately, you don't have to sacrifice image quality just to reduce file size. Modern image compression techniques allow you to significantly decrease file size while keeping your images sharp, detailed, and visually appealing. Whether you're managing a website, running an online store, sharing photos on social media, or sending images by email, understanding how to compress images properly can save both time and storage.
Many people assume that compression always makes an image blurry or pixelated. In reality, that's only true when compression is applied incorrectly. Choosing the right image format, using appropriate compression settings, and resizing images before uploading can dramatically reduce file size while maintaining excellent visual quality.
In this guide, you'll learn how image compression works, the difference between lossy and lossless compression, which image formats provide the best results, common mistakes to avoid, and practical techniques for reducing image size without noticeable quality loss.
What Is Image Compression?
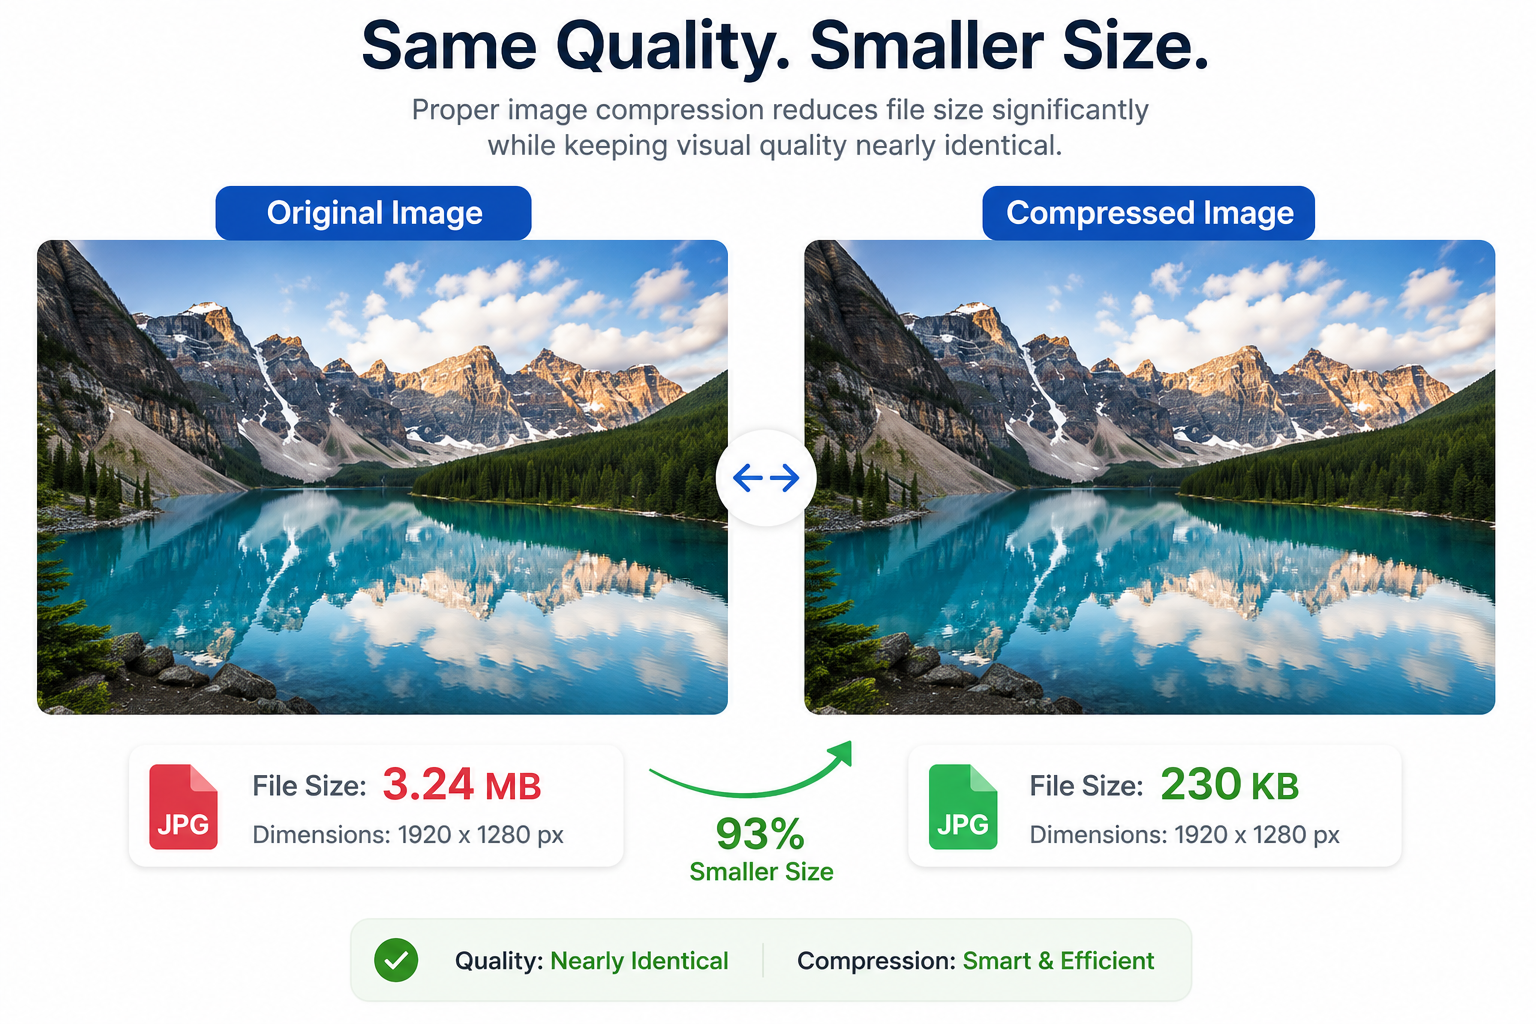
Image compression is the process of reducing an image's file size while keeping its visual appearance as close to the original as possible. The primary goal isn't simply to make the file smaller—it's to remove unnecessary data so the image can be stored, uploaded, downloaded, and displayed more efficiently without noticeably affecting its quality.
Every digital image contains information such as colors, pixels, metadata, and other data required to display it correctly. Compression analyzes this information and stores it in a more efficient way. Depending on the compression method, the file size can often be reduced by 30% to 90% while the image still looks nearly identical to the human eye.
What Image Compression Means
Think of image compression like packing a suitcase for a trip. Instead of throwing everything inside randomly, you organize your belongings more efficiently so everything fits into a smaller space. The contents remain almost the same, but they occupy much less room.
Image compression works in a similar way. It reorganizes image data so the file requires less storage while maintaining a high level of visual quality.
How Image Compression Works
Compression algorithms examine every part of an image to identify patterns, repeated colors, and information that can be stored more efficiently. Some methods simply reorganize the existing data, while others remove tiny details that most people cannot easily notice.
The result is a much smaller file that loads faster, requires less storage, and uses less bandwidth when shared online.
Why File Size Changes
The amount of compression depends on several factors, including the image format, resolution, color depth, dimensions, and compression settings. A large camera photo usually contains far more information than a simple website illustration, so the two images compress very differently even if they have similar dimensions.
This is why there isn't a single compression setting that's perfect for every image. Each image should be optimized based on how it will be used.
Does Compression Always Reduce Quality?
No. This is one of the biggest misconceptions about image optimization. Many compression methods reduce file size without causing any visible difference. Even when small amounts of image data are removed, the change is often impossible to notice during normal viewing.
Problems usually occur only when images are compressed too aggressively or compressed multiple times. In those cases, you may begin to notice blurry edges, visible artifacts, faded colors, or pixelation.
Key Takeaway
Image compression isn't about making images look worse—it's about storing them more efficiently. When done correctly, you can dramatically reduce file size while keeping the image looking almost identical to the original.
Why Compress Images?
Image compression isn't only about saving storage space. Smaller image files improve website performance, enhance the user experience, reduce bandwidth usage, and make images much easier to upload and share. Whether you're running a blog, an online store, a portfolio, or simply sharing photos with friends, compressing images offers several important benefits.
Here are the biggest reasons why image compression should be part of every workflow.
Faster Website Loading
Large images are one of the most common reasons websites load slowly. Compressing images reduces the amount of data visitors need to download, helping pages load much faster on both desktop and mobile devices.
Better SEO Performance
Search engines prefer fast websites because they provide a better user experience. Optimized images can improve page speed, support Core Web Vitals, and increase your chances of ranking higher in search results.
Save Storage Space
Smaller image files take up less storage on your computer, phone, cloud drive, or web hosting account. This allows you to store more images without quickly running out of space.
Faster Uploads and Downloads
Compressed images upload more quickly to websites, social media platforms, and cloud storage. They also download faster, especially for users with slower internet connections.
Easier Sharing
Many email providers and messaging apps limit attachment sizes. Compressing images makes it much easier to send photos through email, WhatsApp, Slack, Telegram, and other communication platforms.
Lower Bandwidth Usage
Every time someone views an image on your website, bandwidth is used. Smaller images consume less bandwidth, which can reduce hosting costs and improve performance during periods of heavy traffic.
Benefits of Compressing Images
- ✓ Faster website loading times.
- ✓ Better SEO and Core Web Vitals.
- ✓ Reduced storage requirements.
- ✓ Faster uploads and downloads.
- ✓ Easier file sharing.
- ✓ Lower bandwidth consumption.
- ✓ Improved experience for mobile users.
Lossy vs Lossless Compression
One of the most important concepts in image optimization is understanding the difference between lossy and lossless compression. Both methods reduce file size, but they do it in different ways. Choosing the right one depends on how the image will be used and how much quality you're willing to sacrifice.
If you're unsure which option to choose, don't worry. For most everyday situations, the answer is straightforward once you understand how each method works.
What Is Lossy Compression?
Lossy compression reduces file size by permanently removing some image data that is considered less noticeable to the human eye. Because certain information is discarded, the original image cannot be fully restored after compression.
When used with moderate settings, lossy compression often produces images that look almost identical to the original while reducing file size dramatically.
Best for:
- Websites
- Blogs
- Social media
- Email attachments
- Online stores
What Is Lossless Compression?
Lossless compression reduces file size without removing any image information. Every pixel is preserved, allowing the image to retain its original quality. Although the file size reduction is usually smaller than with lossy compression, the image remains exactly the same.
This method is ideal whenever preserving every detail is more important than achieving the smallest possible file size.
Best for:
- Logos
- Graphics
- Screenshots
- Design projects
- Images that will be edited later
Which One Should You Choose?
There isn't a single correct answer. If your priority is faster loading websites and smaller file sizes, lossy compression is usually the better choice. If maintaining perfect image quality is essential, lossless compression is the safer option.
For most websites, using moderate lossy compression provides the best balance between image quality and performance. Visitors rarely notice any visual difference, but they immediately benefit from faster page loading.
Real-World Examples
Photography Website
Use light lossy compression to keep photos looking beautiful while reducing loading times.
Company Logo
Use lossless compression to preserve sharp edges, colors, and transparency.
Social Media Images
Moderate lossy compression keeps upload sizes small without noticeable quality loss.
Quick Tip
If you're optimizing images for websites, blogs, or online stores, a carefully balanced lossy compression setting usually delivers the best results. If you're working with logos, illustrations, or design files that require perfect quality, choose lossless compression instead.
Best Image Formats for Compression
Choosing the right image format is just as important as compressing the image itself. Even with excellent compression, using the wrong format can result in unnecessarily large files or lower image quality. Each format is designed for different types of images, so understanding when to use them helps you achieve the best balance between quality and file size.
Below are the most popular image formats and the situations where each one performs best.
JPEG (JPG)
JPEG is one of the most widely used image formats on the web. It uses lossy compression, allowing photos to become much smaller while maintaining excellent visual quality. It's the ideal choice for photographs and images with millions of colors.
Best for:
- Photographs
- Travel images
- Product photos
- Blog featured images
PNG
PNG uses lossless compression, meaning it preserves every detail of the original image. It also supports transparent backgrounds, making it popular for logos, illustrations, icons, and screenshots.
Best for:
- Logos
- Icons
- Transparent images
- Screenshots
WebP
WebP is a modern image format developed for the web. It supports both lossy and lossless compression while producing significantly smaller files than JPEG or PNG in many situations. It also supports transparency, making it an excellent all-around format for websites.
Best for:
- Modern websites
- Blogs
- E-commerce stores
- Landing pages
AVIF
AVIF is one of the newest image formats and offers exceptional compression efficiency. It can often produce even smaller files than WebP while maintaining outstanding image quality. However, support in some older browsers and applications is still improving.
Best for:
- High-performance websites
- Large image galleries
- Future-focused web projects
SVG
Unlike the other formats, SVG is a vector image format rather than a pixel-based image. SVG graphics can scale to any size without losing quality, making them perfect for logos, icons, and simple illustrations.
Best for:
- Logos
- Icons
- Charts
- Illustrations
Which Format Should You Choose?
There isn't a single image format that's perfect for every situation. Instead, choose the format based on the type of image you're working with. Photographs usually perform best as JPEG or WebP, logos and graphics often benefit from PNG or SVG, while AVIF is an excellent choice for websites that prioritize maximum performance.
Quick Recommendation
- 📷 Photos: JPEG or WebP
- 🛍️ Product Images: WebP
- 🎨 Logos & Icons: SVG or PNG
- 📱 Websites: WebP or AVIF
- 🖥️ Screenshots: PNG
How to Compress Images Without Losing Quality
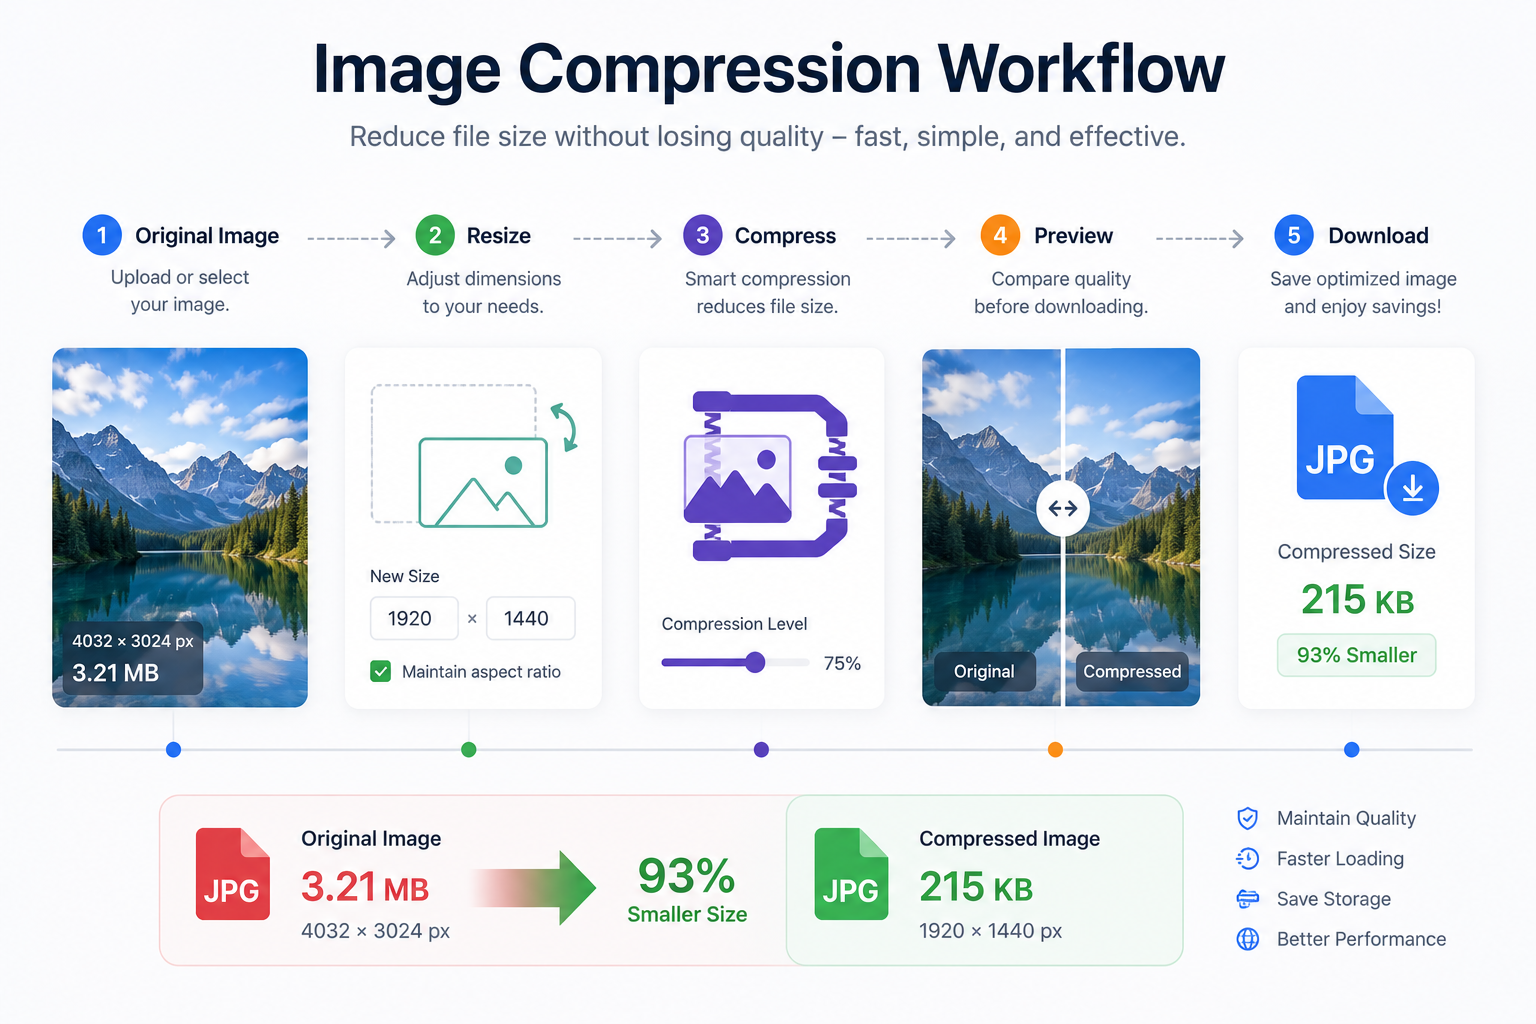
Compressing an image without noticeably reducing its quality is easier than many people think. Instead of applying the highest compression setting immediately, the goal is to make several small optimizations that work together. Choosing the right file format, resizing the image, removing unnecessary data, and using a balanced compression level can dramatically reduce file size while preserving sharpness and detail.
Follow these practical steps whenever you want smaller image files without sacrificing visual quality.
1. Choose the Right Image Format
Before compressing, make sure you're using the correct image format. Photos generally work best as JPEG or WebP, while logos and screenshots are usually better suited for PNG or SVG.
2. Resize the Image First
Don't upload a 6000-pixel-wide image if your website only displays it at 1200 pixels. Reducing image dimensions before compression often saves more space than compression alone.
3. Use a Balanced Compression Level
Avoid using the maximum compression setting. Moderate compression usually removes a large amount of file size while keeping the image visually identical to the original.
4. Preview Before Saving
Always compare the compressed image with the original. Zoom in and check text, edges, gradients, and fine details before downloading or publishing.
5. Remove Unnecessary Metadata
Many images contain hidden information such as camera settings, GPS coordinates, and timestamps. Removing this metadata can further reduce file size without affecting image appearance.
Compress Your Images in Seconds
Want to reduce image size without installing any software? Use our free Image Compressor to compress JPG, PNG, WebP, and AVIF images directly in your browser. Simply upload your image, adjust the compression level, preview the results, and download the optimized version in seconds.
- ✓ Supports JPG, PNG, WebP, and AVIF
- ✓ Adjustable compression quality
- ✓ Live image preview before downloading
- ✓ Fast browser-based processing
- ✓ No registration required
- ✓ Free to use
Best Compression Settings for Different Use Cases
There isn't a single compression setting that's perfect for every image. The ideal level depends on where the image will be used. A website banner, a printed brochure, and a WhatsApp photo all have different quality requirements. Choosing the right balance between file size and image quality ensures your images look great without becoming unnecessarily large.
Websites and Blogs
Website images should load quickly while remaining sharp. Moderate compression usually provides the best balance, helping pages load faster and improving SEO without creating noticeable quality loss.
Recommended:
- • Format: WebP or JPEG
- • Compression: Medium (70–85%)
- • Resize images before uploading
Social Media
Most social media platforms automatically compress uploaded images. Uploading an already optimized image helps maintain better quality after the platform performs its own compression.
Recommended:
- • Format: JPEG or WebP
- • Medium compression
- • Export at the platform's recommended dimensions
Email Attachments
Email providers often limit attachment sizes. Compressing images before sending allows you to attach more photos while keeping download times short for recipients.
Recommended:
- • Format: JPEG
- • Medium to high compression
- • Resize large camera photos first
Printing
Printed images require much higher quality than digital images. Avoid aggressive compression and keep the original resolution whenever possible.
Recommended:
- • Format: PNG or high-quality JPEG
- • Low compression
- • Keep the original dimensions
Professional Photography
Photographers should always keep the original image as a backup. Create compressed copies only for websites, portfolios, or client previews while preserving the master file for future editing.
Pro Tip
Start with a moderate compression level and preview the result before downloading. If you can't see a noticeable difference compared to the original image, you've likely found the ideal balance between quality and file size.
Final Thoughts
Image compression isn't about making your images look worse—it's about making them work smarter. By reducing unnecessary file size while preserving visual quality, you create faster websites, improve the user experience, save storage space, and make sharing images much easier.
There isn't a single compression method that works for every situation. The best results come from choosing the right image format, resizing images when necessary, selecting an appropriate compression level, and always reviewing the final image before publishing or sharing it.
Whether you're a blogger, web developer, photographer, online seller, student, or business owner, optimizing images should become a regular part of your workflow. Small improvements to your images can lead to noticeably faster loading times, better SEO performance, lower bandwidth usage, and a more professional experience for your audience.
Remember These Five Tips
- ✓ Choose the right image format for the job.
- ✓ Resize large images before compressing them.
- ✓ Avoid compressing the same image multiple times.
- ✓ Preview the final image before using it.
- ✓ Keep the original image as a backup whenever possible.
The best image is one that looks great and loads quickly. By applying the techniques covered in this guide, you can significantly reduce file sizes without sacrificing quality, creating a better experience for both your visitors and search engines.