
Introduction
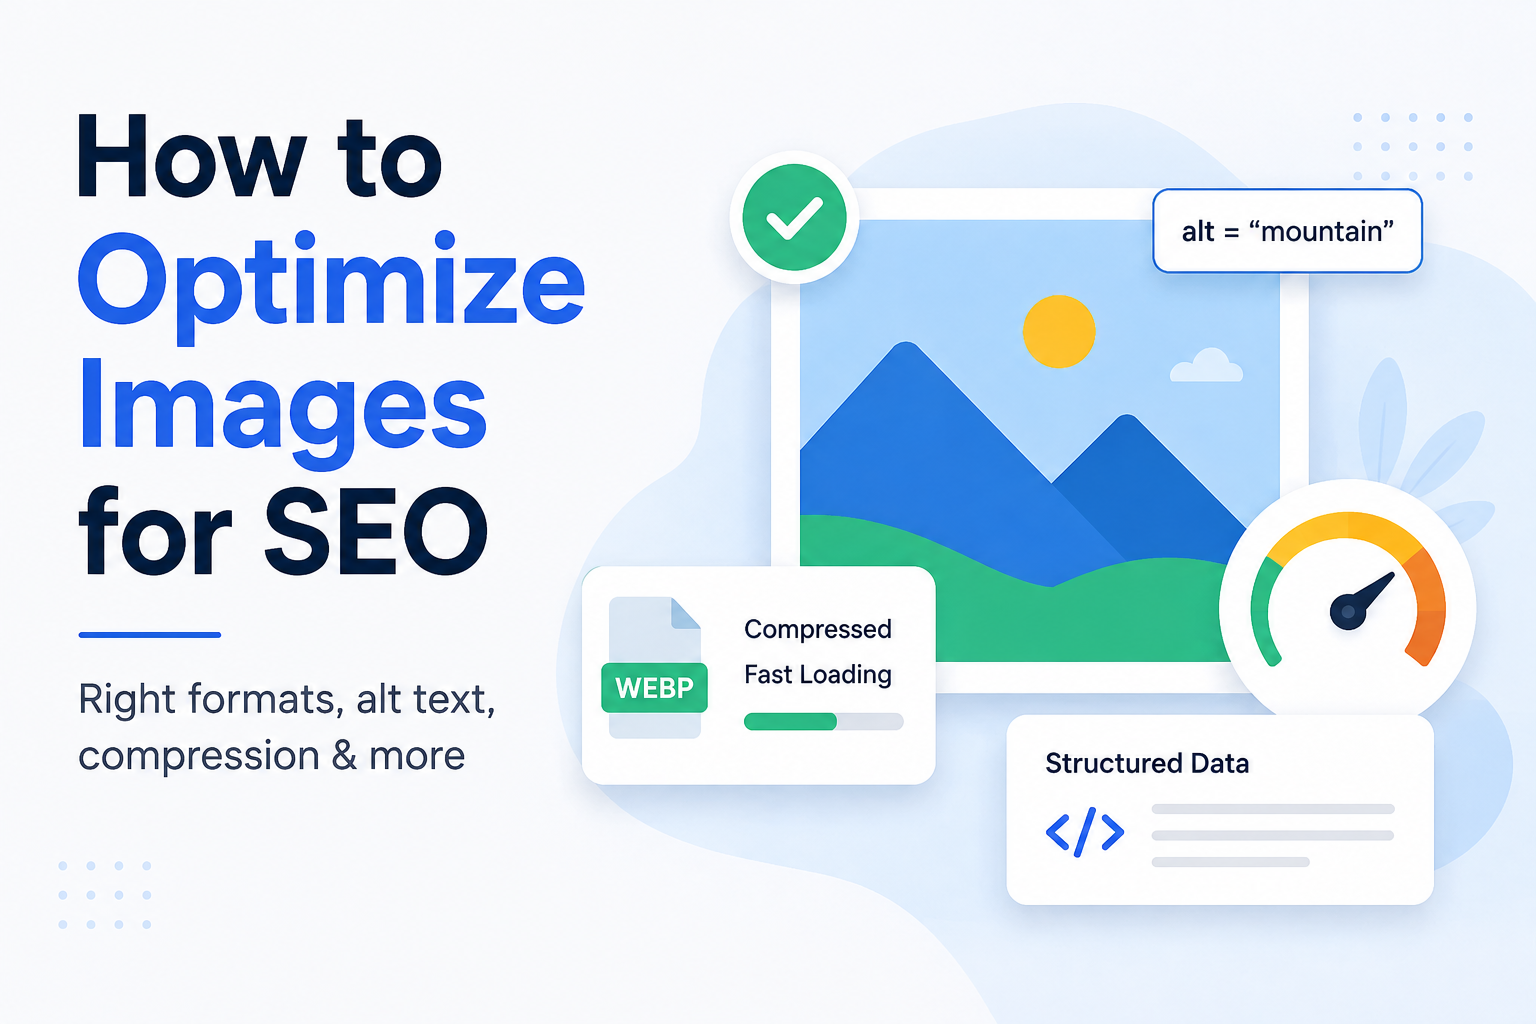
Images do much more than make a webpage look attractive—they play an important role in search engine optimization (SEO), website performance, and user experience. Well-optimized images can help your pages load faster, improve accessibility, appear in Google Images, and even contribute to higher rankings in search results. Whether you run a blog, an online store, a portfolio, or a business website, image optimization should be an essential part of your SEO strategy.
Unfortunately, many website owners upload images directly from their camera or design software without making any optimizations. Large file sizes, incorrect dimensions, missing alt text, and poor file names can slow down your website and reduce its visibility in search engines. These small mistakes may seem insignificant, but together they can negatively affect page speed, Core Web Vitals, and the overall user experience.
The good news is that optimizing images doesn't have to be complicated. A few simple improvements—such as compressing images, choosing the right file format, resizing them before uploading, and writing descriptive alt text—can dramatically improve your website's performance. These optimizations help search engines understand your images while ensuring visitors enjoy faster loading pages across desktop and mobile devices.
If your images are too large, start by reducing their file size without sacrificing visual quality. An Image Compressor helps decrease file sizes, improving loading speed and SEO. If you need to display images at specific dimensions, an Image Resizer ensures they're the correct size before uploading, preventing unnecessary bandwidth usage. For even better performance, converting JPEG or PNG images into the modern WebP format can significantly reduce file sizes while maintaining excellent image quality.
In this complete guide, you'll learn how Google understands images, how to choose the best image formats, write effective alt text, improve page speed, avoid common optimization mistakes, and follow proven image SEO best practices. By the end, you'll have a practical workflow you can apply to every image you publish, helping your website load faster, rank better, and deliver a superior experience for every visitor.

Why Image SEO Matters
Image SEO is much more than reducing file sizes. Every image on your website affects loading speed, search engine visibility, accessibility, and the overall user experience. When images are properly optimized, they help search engines understand your content while giving visitors a faster and smoother browsing experience.
Whether you're publishing blog articles, managing an online store, or building a business website, optimizing every image can improve your website's performance and increase the chances of attracting more organic traffic.
Images Affect Page Speed
Large image files are one of the biggest reasons websites load slowly. A slow-loading page increases bounce rates because visitors often leave before the content finishes loading. Google also considers page speed when evaluating the overall user experience.
Before uploading any image, compress it to reduce its file size without noticeably affecting quality. An Image Compressor is one of the easiest ways to improve loading speed while maintaining professional-looking images.
Google Images Can Drive Traffic
Millions of people search using Google Images every day. Properly optimized images with descriptive file names, meaningful alt text, and relevant surrounding content have a better chance of appearing in image search results.
This creates another source of organic traffic in addition to traditional web search, helping more people discover your website through visual search results.
Better User Experience
Visitors expect pages to load quickly and display sharp, properly sized images. Oversized or blurry images create a poor first impression and may reduce engagement.
Resize images to match the dimensions required by your website before uploading them. Using an Image Resizer prevents browsers from downloading unnecessarily large files and improves loading performance.
Improves Core Web Vitals
Google's Core Web Vitals measure how quickly pages load and become interactive. Heavy images often increase loading times and negatively affect metrics such as Largest Contentful Paint (LCP).
Compressing images, choosing efficient formats like WebP, and enabling lazy loading all contribute to better Core Web Vitals and a smoother browsing experience.
Supports Accessibility
Image SEO isn't only about search engines. Accessibility is equally important. Visitors using screen readers rely on descriptive alternative text to understand images they cannot see.
Writing clear and meaningful alt text improves accessibility while also giving search engines additional context about your images, making it a win for both users and SEO.
Key Takeaway
Every optimized image contributes to a faster website, better user experience, stronger accessibility, and improved search visibility. Simply compressing images, resizing them correctly, using modern formats like WebP, and adding descriptive alt text can make a noticeable difference in your website's SEO performance.
How Google Understands Images
Unlike humans, Google can't "see" an image the way we do. Instead, it analyzes several signals to understand what an image represents and whether it's relevant to a user's search query. That's why image SEO isn't just about uploading attractive visuals—it's about providing enough context for search engines to interpret and index them correctly.
The better Google understands your images, the more likely they are to appear in Google Images, rich search results, and traditional organic search. Here are the most important signals Google uses when evaluating images.
Image Crawling
Before an image can appear in Google Search, Google's crawler must be able to discover and access it. Images blocked by robots.txt, broken image URLs, or pages that aren't indexed are much less likely to appear in search results.
Keep your images accessible, use proper HTML image tags, and ensure they're included on indexable pages so search engines can crawl them efficiently.
Descriptive File Names
File names provide one of the first clues about an image's content. Instead of uploading files with names like IMG_4829.jpg or photo1.png, use descriptive names that explain what the image shows.
For example, red-running-shoes.jpg tells Google much more than DSC00124.jpg. Use lowercase letters, separate words with hyphens, and include relevant keywords naturally without keyword stuffing.
Alt Text
Alternative text (alt text) describes an image for search engines and people using screen readers. A well-written alt attribute improves accessibility while helping Google understand the purpose of the image.
Describe the image naturally and accurately. Instead of writing keyword-filled phrases, explain what the image actually shows in a way that would make sense if someone couldn't see it.
Surrounding Content
Google also looks at the content around an image. Headlines, paragraphs, captions, and nearby text help provide context and confirm that the image is relevant to the page's topic.
Place images close to the content they support. For example, if your article explains image compression, the accompanying image should illustrate that process rather than showing an unrelated stock photo.
Structured Data
Structured data, also known as schema markup, provides additional information about your content. Depending on the page type, schema can help search engines better understand products, recipes, articles, and other content that includes images.
While schema doesn't guarantee higher rankings, it improves how search engines interpret your pages and may increase your chances of appearing in enhanced search results where images play a prominent role.
Google Looks at More Than the Image
Search engines evaluate multiple signals together to understand every image on your website.
- ✓ Descriptive file names.
- ✓ Accurate alt text.
- ✓ Relevant surrounding content.
- ✓ Fast loading speed.
- ✓ Proper image dimensions.
- ✓ Structured data when applicable.
The more helpful these signals are, the easier it becomes for Google to understand, index, and display your images in search results.
Choosing the Right Image Format
Selecting the correct image format is one of the easiest ways to improve your website's SEO and performance. Every format has its own strengths, and choosing the wrong one can result in larger file sizes, slower loading speeds, or reduced image quality. Understanding when to use each format helps you create faster pages without sacrificing the visual experience.
Modern websites rarely rely on a single image format. Instead, they combine different formats based on the type of image being displayed. Photographs, logos, illustrations, screenshots, and icons all have different requirements, so selecting the right format for each situation produces the best results.
JPEG (JPG)
JPEG is one of the most widely used image formats on the web. It's an excellent choice for photographs and images with lots of colors because it provides relatively small file sizes while maintaining good visual quality.
However, JPEG uses lossy compression, meaning image quality decreases slightly each time it's compressed. For blog featured images, travel photos, product photography, and lifestyle images, JPEG remains a reliable option.
PNG
PNG is best for graphics that require transparency, such as logos, icons, screenshots, and illustrations. Unlike JPEG, PNG preserves image quality without compression artifacts.
The downside is that PNG files are often much larger. If transparency isn't required, converting PNG images into WebP usually results in significantly smaller files while maintaining excellent quality.
WebP
WebP is one of the best image formats for modern websites. It supports both lossy and lossless compression while producing much smaller file sizes than JPEG and PNG. Smaller files improve page speed, Core Web Vitals, and overall SEO performance.
If your website still relies on JPEG or PNG images, using a WebP Converter is one of the quickest ways to improve loading speed without making noticeable sacrifices in image quality.
AVIF
AVIF is an even newer image format that often produces smaller file sizes than WebP while maintaining outstanding visual quality. It's becoming increasingly popular as browser support continues to improve.
For websites targeting modern browsers, AVIF can be an excellent choice when maximum compression and performance are priorities.
SVG
SVG is completely different from other image formats because it's vector-based instead of pixel-based. This means SVG graphics remain perfectly sharp regardless of screen size or resolution.
SVG is ideal for logos, icons, diagrams, buttons, and simple illustrations. It should not be used for photographs because vector graphics aren't designed for complex images.
| Format | Best For | Advantages | Limitations |
|---|---|---|---|
| JPEG | Photographs | Small size, broad compatibility | No transparency, lossy compression |
| PNG | Logos, screenshots, graphics | Transparency, lossless quality | Larger file sizes |
| WebP | Most website images | Excellent compression and quality | Older browser support is limited |
| AVIF | Modern websites | Outstanding compression | Not supported everywhere |
| SVG | Icons, logos, illustrations | Infinite scaling, tiny files | Not suitable for photographs |
Our Recommendation
For most websites, this simple workflow delivers the best balance between image quality and SEO performance:
- ✓ Use JPEG for standard photographs.
- ✓ Use PNG only when transparency is required.
- ✓ Convert images to WebP whenever possible for faster loading.
- ✓ Compress every image before uploading.
- ✓ Resize images to the exact dimensions your website needs.
Combining an Image Compressor, Image Resizer, and WebP Converter before uploading images is one of the easiest ways to improve both page speed and search engine rankings.
Common Image SEO Mistakes
Even websites with high-quality content often lose valuable search traffic because of poor image optimization. These mistakes can slow down your website, reduce accessibility, and make it harder for search engines to understand your images. Fortunately, they're easy to fix once you know what to look for.
Before publishing your next article or product page, review the following mistakes and make sure none of them are affecting your website.
Uploading Large Images
One of the biggest mistakes is uploading high-resolution images directly from a camera or design tool. These files are often several megabytes in size, causing pages to load slowly and negatively affecting both user experience and SEO.
Before uploading, reduce the file size using an Image Compressor. Visitors won't notice the difference in quality, but they'll definitely notice a faster website.
Using the Wrong Image Dimensions
Many websites upload images that are much larger than necessary. For example, displaying a 4000-pixel image inside a 1200-pixel container wastes bandwidth because browsers still download the entire file.
Resize every image before uploading. An Image Resizer ensures images match your website's layout while reducing loading times.
Using Generic File Names
File names like IMG_001.jpg or Screenshot123.png provide no useful information to search engines.
Rename every file using descriptive words such as image-compression-guide.webp or seo-image-optimization.jpg. This helps Google better understand your content.
Missing Alt Text
Alt text is often forgotten, yet it's one of the easiest ways to improve accessibility and provide additional context to search engines.
Describe what the image actually shows using natural language. Avoid stuffing keywords or writing vague descriptions that don't help users.
Ignoring Modern Image Formats
Many websites continue uploading only JPEG and PNG files, even though modern formats like WebP can significantly reduce file sizes while maintaining excellent image quality.
Converting older images using a WebP Converter is one of the quickest improvements you can make for page speed and Core Web Vitals.
Forgetting Mobile Users
Most visitors browse websites on smartphones, yet many sites still serve oversized desktop images to every device.
Responsive images and proper sizing help mobile visitors enjoy faster loading pages while reducing unnecessary data usage.
Skipping Lazy Loading
Loading every image immediately increases the amount of data downloaded when a page first opens, especially on image-heavy pages.
Lazy loading delays off-screen images until they're needed, improving loading speed and creating a smoother browsing experience.
Optimizing Only Featured Images
Some website owners optimize only the featured image while ignoring screenshots, icons, diagrams, banners, and inline images throughout the article.
Every image contributes to your page's performance. Applying the same optimization process across your entire website delivers the best long-term SEO results.
Avoid These Mistakes
Before publishing any page, ask yourself:
- ✓ Is the image compressed?
- ✓ Is it resized correctly?
- ✓ Does it use the best file format?
- ✓ Does it have descriptive alt text?
- ✓ Does the file name describe the image?
- ✓ Will it load quickly on mobile devices?
Best Practices for Image SEO
Optimizing a few images can improve individual pages, but following consistent image SEO best practices across your entire website delivers much greater long-term results. Every image you publish should follow the same workflow so your site remains fast, accessible, and search-engine friendly as it grows.
Whether you're publishing blog posts, product pages, portfolios, or landing pages, these best practices will help you build a faster website while improving your chances of ranking in both Google Search and Google Images.
Prioritize Website Speed
Speed should always be your first priority. Large images are one of the biggest reasons websites load slowly, especially on mobile devices. Every second of delay can increase bounce rates and reduce conversions.
Compress images before uploading them and avoid using files that are larger than necessary. Faster websites provide a better user experience and support stronger SEO performance.
Maintain High Visual Quality
Reducing file size doesn't mean sacrificing image quality. Visitors still expect sharp, professional-looking visuals that represent your brand well.
Compress images carefully so they're smaller but still look clean on desktop, tablet, and mobile screens.
Optimize Every Image
Don't limit optimization to featured images. Product photos, screenshots, icons, banners, infographics, author photos, and inline illustrations all contribute to your website's performance.
Applying the same optimization process to every image creates a consistently fast and professional website.
Use Modern Image Formats
Whenever possible, choose modern formats like WebP or AVIF. They provide excellent image quality while significantly reducing file sizes compared to traditional JPEG and PNG images.
If your existing website contains older image formats, converting them with a WebP Converter can improve loading speed without requiring you to recreate the images.
Resize Before You Upload
Always upload images at the dimensions they'll actually be displayed. Oversized images waste bandwidth and force browsers to perform unnecessary resizing.
An Image Resizer helps you prepare images that perfectly match your website's layout while keeping file sizes under control.
Review Your Website Regularly
Image SEO isn't something you do once and forget. As your website grows, regularly review older pages to identify images that could be compressed further, converted to modern formats, or updated with better alt text.
Periodic maintenance keeps your website performing well and ensures new content follows the same optimization standards as older pages.
Image SEO Best Practices Checklist
- ✓ Compress every image before uploading.
- ✓ Resize images to the correct dimensions.
- ✓ Prefer WebP or AVIF whenever possible.
- ✓ Write meaningful alt text.
- ✓ Use descriptive file names.
- ✓ Enable lazy loading.
- ✓ Optimize every image—not just featured images.
- ✓ Review and update older images regularly.
Free Image SEO Tools That Make Optimization Easier
Optimizing images manually can become time-consuming, especially if your website contains hundreds of images. Fortunately, the right tools can automate much of the work while helping you improve page speed, maintain image quality, and prepare images for search engines. Whether you're publishing blog posts, running an online store, or managing a portfolio, these tools can save time and improve your overall SEO workflow.
Below are some of the most useful image optimization tools and when you should use each one.
Image Compressor
Compressing images should be your first step before uploading any file to your website. Smaller file sizes improve loading speed, reduce bandwidth usage, and contribute to better Core Web Vitals without noticeably reducing image quality.
Use an Image Compressor whenever you're preparing blog images, product photos, featured images, banners, or screenshots for your website.
Image Resizer
Oversized images waste bandwidth because browsers still download the entire file even when it's displayed much smaller. Resizing images before uploading ensures visitors download only the dimensions they actually need.
An Image Resizer is ideal for preparing blog thumbnails, featured images, product photos, hero banners, and social media graphics.
WebP Converter
WebP is one of the best formats for modern websites because it provides excellent image quality with much smaller file sizes than JPEG or PNG. Smaller files improve loading speed and overall SEO performance.
Use a WebP Converter whenever you want to modernize your website's images without recreating them from scratch.
JPG to PNG Converter
Some graphics require transparency or lossless quality. Converting JPG images to PNG can be useful when editing graphics or creating assets that need transparent backgrounds.
Choose the format based on your needs rather than converting every image unnecessarily.
PNG to JPG Converter
PNG files can become unnecessarily large when transparency isn't needed. Converting them to JPG often reduces file size dramatically, making them more suitable for photographs and large website images.
This is especially useful when preparing travel photos, blog featured images, and product photography.
Explore Our SEO ToolsImage SEO Is Only One Part of the Bigger Picture
Optimizing your images can significantly improve page speed, accessibility, and visibility in Google Images, but it's only one part of a successful SEO strategy. Search engines also evaluate your page title, meta description, headings, content quality, internal linking, mobile usability, structured data, and dozens of other ranking signals before determining where your page should appear in search results.
After optimizing your images, it's worth reviewing the rest of your page for additional SEO improvements. Our On-Page SEO Checker can help identify missing meta tags, heading issues, keyword optimization opportunities, broken links, image optimization problems, and other technical SEO issues that may affect your rankings.
Combining properly optimized images with a well-structured, SEO-friendly page gives your content the best chance of ranking higher in search results while providing a better experience for your visitors.
Final Thoughts
Image SEO is one of the simplest improvements you can make to your website, yet it's often overlooked. Every optimized image contributes to a faster website, better user experience, improved accessibility, and stronger search engine visibility. While a single optimized image won't dramatically change your rankings, applying these best practices consistently across your entire website can have a significant long-term impact.
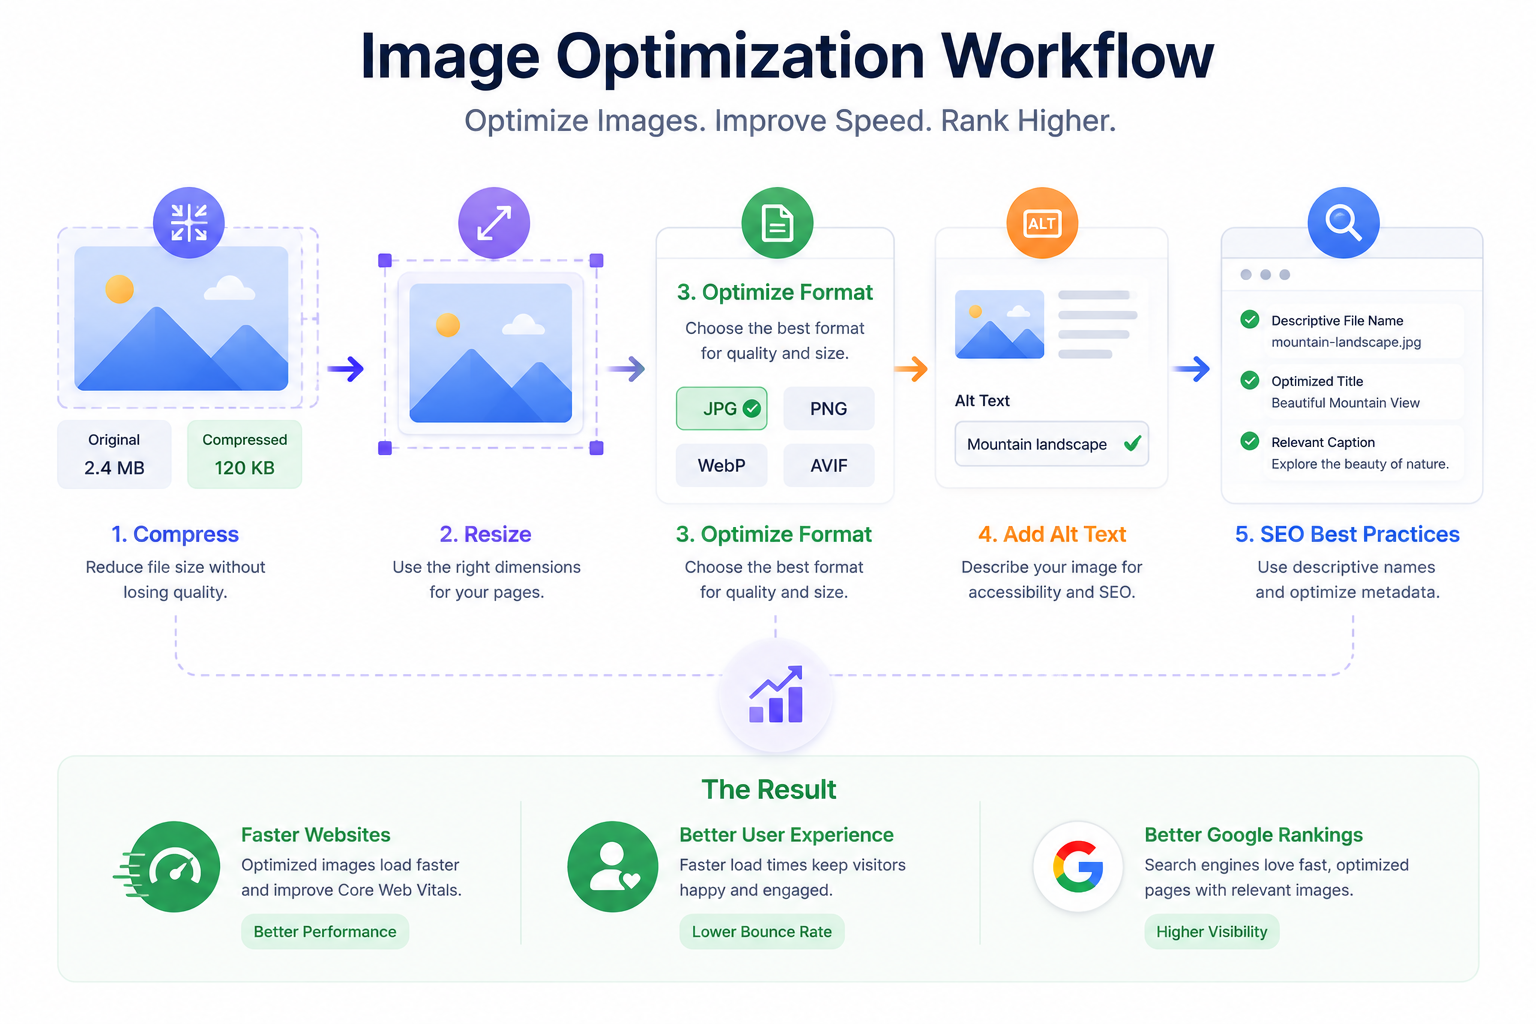
Before uploading any image, make it a habit to choose the right format, resize it to the correct dimensions, compress it without sacrificing quality, write descriptive alt text, and use a meaningful file name. These small improvements only take a few minutes but can save bandwidth, improve Core Web Vitals, and help search engines better understand your content.
Remember that image optimization works best when it's part of a complete SEO strategy. Pair fast, well-optimized images with high-quality content, clear page structure, descriptive metadata, and strong on-page SEO to give your website the best opportunity to rank higher and provide a better experience for every visitor.
Key Takeaways
- ✓ Choose the right image format for every use case.
- ✓ Resize images before uploading them.
- ✓ Compress every image to improve loading speed.
- ✓ Prefer modern formats like WebP whenever possible.
- ✓ Write descriptive file names and meaningful alt text.
- ✓ Optimize every image—not just featured images.
- ✓ Review your pages regularly to maintain strong SEO performance.
By following the workflow outlined in this guide, you'll build a faster, more search-friendly website that benefits both your visitors and search engines. Make image optimization part of your publishing routine, and the results will continue to compound as your website grows.